Setting Up EPASS Pay
The EPASS Pay setup should only be completed by IT personnel or someone with full EPASS security access. Setting up EPASS Pay will need to be completed for each branch.
Before Starting
- You will need the Merchant ID for your branch that was provided by Fullsteam. If you do not have the Merchant ID, contact EPASS support for help.
Connect Payment Terminals to Your Network
Follow the instructions that came with your payment terminals to connect them to your network.
If you have a Move/5000 terminal, view instructions for connecting it to your wireless network here.
Once each terminal is successfully connected, continue with the next section, Activate EPASS Pay Security Options.
Activate EPASS Pay Security Options
To complete the EPASS Pay setup, you'll need to activate at least two security options. After the setup, some or all of these security options will need to be activated for each person that will use Pulse.
To Activate EPASS Pay Security Options
-
Log into EPASS.
-
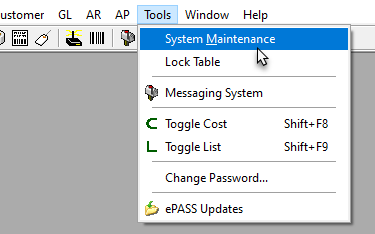
Go to Tools > System Maintenance.
-
On the Tables tab, select User Security, and then click Open.

-
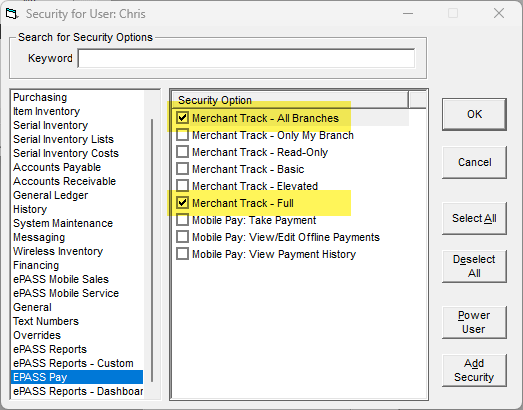
Select your account from the list, and then click Security.

-
In the menu on the left, click EPASS Pay. Select Merchant Track - All Branches and Merchant Track - Full. (The additional security settings are optional and not required to complete the EPASS Pay setup. They can be activated as needed for each Merchant Track user at a later time.)
-
In the Keyword field, enter
add payment. Enable the security options highlighted below so that the user can use these payment entry methods.
Security Option Description Invoice Detail - Add Payment Grants the user the ability to add a payment line to the invoice. Invoice Detail - Add Payment - Form Keyed Grants the user the ability to use the Form Keyed entry method when processing a card payment. 
Invoice Detail - Add Payment - Pinpad Keyed Pos Grants the user the ability to use the Pin Pad Keyed entry method to process a card payment for a positive amount. 
Invoice Detail - Add Payment - Pinpad Keyed Neg Grants the user the ability to use the Pin Pad Keyed entry method to process a refund (negative amount). 
Note The Entry Method dropdown is only available when processing a refund without an original transaction number. See Refunding an EPASS Pay Transaction for more info.Invoice Detail - Add Payment - Card on File Grants the user the ability to use the Card on File entry method. 
Invoice Detail - Add Payment - Save Card Grants the user the ability to save the card information when processing a card payment.  Note
NoteYou also need to enable these security options if you use EPASS Mobile Service.
-
In the Keyword field, enter
refund. Enable the highlighted security options below to allow the EPASS User to complete an integrated refund.
-
In the Keyword field, enter
preauth. Enable the security option to allow the EPASS User to add the Pre-Authorized payment type.
-
Click OK.

Configure Your "Cash" Customer
You need to make sure that the customer account that you have set up in EPASS for “quick sale” or “cash” transactions is configured for EPASS Pay. This is necessary so that the address verification procedure is skipped when taking EPASS Pay payments on invoices that use this customer account.
-
For Cash Customer account invoices, you must still enter the customer’s name or ZIP/postal code in the following scenarios:
- Pin pad pre-authorization: ZIP/postal code required
- Pin pad keyed sale: Full name required
- Pin pad keyed pre-authorization: Full name and ZIP/postal code required
- Form keyed sale: Full name and ZIP/postal code required.
- Form keyed ACH: Full name required.
-
You cannot use Click to Pay links or save cards on file with Cash Customer accounts.
-
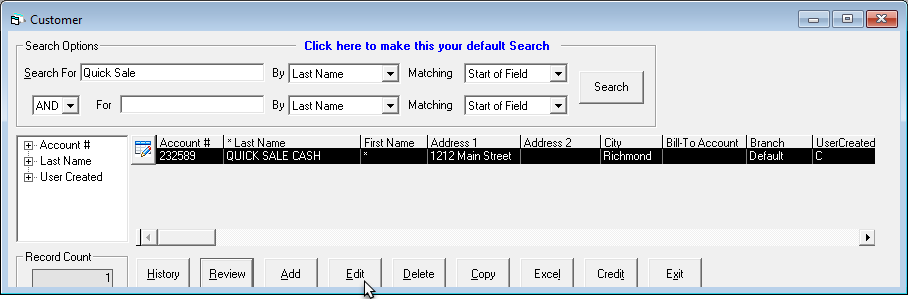
Go to Customer > Maintenance.
-
Search for your “cash” customer, and then click Edit.
-
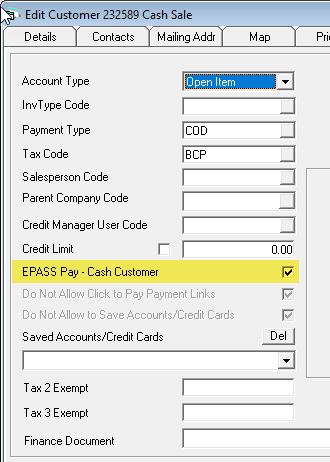
Click the Credit tab.
-
Select the EPASS Pay - Cash Customer checkbox.
-
Click OK to close the Customer record.
Configure EPASS Pay Variables
-
Go to Tools > System Maintenance.
-
Click the Variables tab.
-
Click EPASS Pay, and then click Open.

-
On the EPASS Pay tab, do the following:
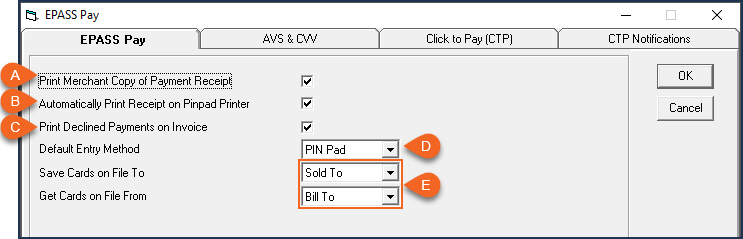
| A | If you want EPASS to print a merchant receipt as well as the customer receipt after each payment transaction, select the Print Merchant Copy of Payment Receipt checkbox. Note: EPASS always prints the customer's copy of the receipt. |
| B | If you’re using a PinPad with a built-in printer, selecting this checkbox will print the customer’s receipt from the PinPad. |
| C | Select this checkbox if you want declined payments to appear on printed invoices. |
| D | Select the default Entry Method for all EPASS Pay payments (PIN Pad, PIN Pad Keyed, Form Keyed, Card on File.) When an EPASS Pay Payment Type is added to an invoice, it will automatically set the Entry Method to the default. (The Entry Method can always be changed on the Invoice at time of payment.) |
| E | By default, credit cards are saved to the customer record that appears in the invoice’s Sold To field and are recalled from the customer record that appears in the invoice’s Bill To field. You can change the defaults using the two dropdowns. |
EPASS always prints the customer's copy of the receipt.
-
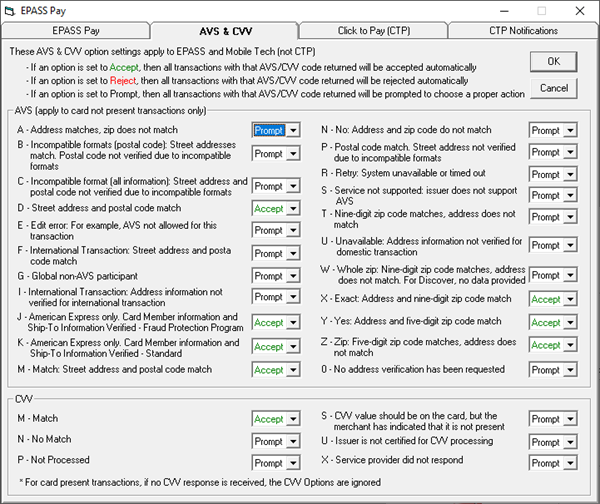
Click the AVS & CVV tab to configure how EPASS Pay manages Address Verification (AVS) and Card Verification Value (CVV) discrepancies. You can choose to either accept or reject payments outright, or prompt for a decision on how to proceed.
-
Once you've completed configuring AVS and CVV, click OK to close the EPASS Pay Variables window.
Enter User Information for Pulse
Each person that will use Pulse needs to enter their name, a phone number, email, and the branch that they're associated with in their EPASS User profile.
To Enter Your Pulse User Information:
-
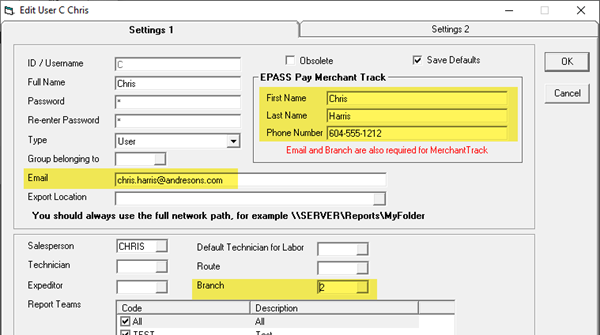
In the User Security window, select your account and then click Edit.

-
On the Settings 1 tab, enter your name and a phone number.
-
If the Email field is blank, enter your email address.
-
In the Branch dropdown, select the branch that you are associated with.
-
Click OK.
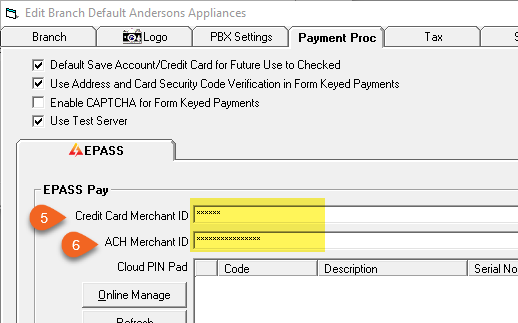
Add Credit Card and ACH Merchant IDs
The Merchant IDs for your branch has been provided by Fullsteam. If you do not have the Merchant ID, contact EPASS support for help.
To Add the Merchant IDs:
-
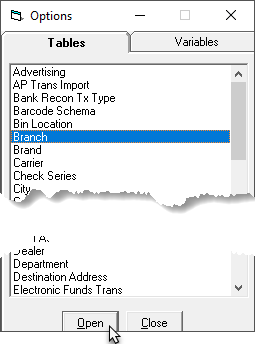
Go to Tools > System Maintenance.
-
On the Tables tab, select Branch, and then click Open.
-
Select a branch, and then click Edit.

-
Click the Payment Proc tab.

-
In the EPASS Pay area, enter the Credit Card Merchant ID.
-
If you have an EPASS Pay ACH Merchant ID, enter it in the ACH Merchant ID field.
Before closing this window, continue with the next section.
Activate Payment Terminals
The final step in the setup process is to activate your payment terminals. Make sure that you have already connected them to your network before continuing.
Follow these instructions to activate your payment terminals.
What's Next?
- Payment Types for EPASS Pay need to be added to EPASS. If this has not been done yet, see Adding EPASS Pay Payment Types.
- Learn how to use Pulse. Start with the About Pulse topic.
June 16, 2026